With Father’s Day just around the corner, my little buddy and I have been busy getting together gifts for the THREE fathers in our lives. When just two years ago, I only had to worry about my own father’s gift, now I am responsible for my husband’s gift, my dad’s gift and my father-in-law’s gift (with the help of my husband, of course)! Seeing as they are all very different men, no “father’s day gift list” can really cover this bunch, so I’ve been thinking really hard lately about what to get them.
Yesterday I got my father-in-law’s gift in the mail and I ordered my husband’s gift on Amazon weeks ago. The really difficult one was my own dad (go figure). When I was a kid, my dad was always the type of guy to say, “don’t get me anything, your company is the best gift” which was sweet, but also frustrating, because I was going to get him SOMETHING and I always had no idea where to start.
Now that my parents live in town, I knew the best gift WOULD be to spend Father’s Day with him. (I don’t know how long it’s been since we’ve spent Father’s Day together… probably since high school). So my husband and I are planning to take him to a local brewery for a lunch. Both my dad and husband LOVE small batch beers and there is no place like Portland to celebrate that.
With our Father’s Day plans in place, I decided to tie in my dad’s gift with our outing. Originally, I planned on buying him some local beers and etching a beer mug to go with them, but when I found these adorable little tasting beer glasses at Target for $1 each (yeah, that’s right… this was $1 spot find!) I knew I would switch gears and make it a beer tasting kit!
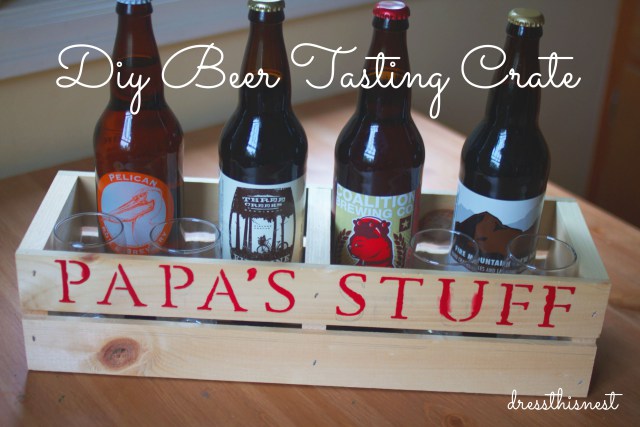
For this kit, I purchased a wood crate, four beers from small local breweries and four beer tasting glasses.
This gift was a two part craft. The first part being painting the crate and the second was etching the glasses.
To paint the crate, I used Martha Stewart alphabet stencils, craft paint and a sponge brush.
Originally I thought I might be able to have my little buddy help paint with the stencils, but once I put the paint brush in his hand it was too scary, so I brought out his finger paints and we both worked on our (separate) crafts.
To keep the letters properly spaced and straight, I first made a straight line across where I wanted the BOTTOM of the stencil to be and then extended it across the whole crate. Then I simply lined up each stencil to the line and traced each stencil with a pencil, until I was satisfied with the spacing.
Then I went back and filled in the stencils with paint. This was trickier than I thought as some of the paint leaked under the stencils. If I could go back I would have purchased the sticker stencils instead.
For the glasses, I decided to etch them with “1″ “2″ “3″ and “4″ so that he could do blind beer taste tests. Here is how I did it:
I used etching cream, masking tape, number stencils, an exacto knife and a paint brush. I wanted to buy Martha Stewart’s etching cream, but the Michael’s I went to only had a HUGE bottle of it.
For this project I made my own “sticker stencil” using masking tape. I traced the number with the exacto knife over the masking tape and cute out the center.
When you put the stencil on the glass, you have to make sure there are no spots where the etching cream can leak through. I smoothed the masking tape to the glass using the unsharp edge of the exact-o knife. You can also use a credit card. After this, I put on a thick coat of etching cream and let it sit for about 10 minutes. The bottom says one minute, but I tried that on a test piece and it barely did anything.