It’s been two and a half weeks since we came home from the hospital and the reality that my husband is returning to work soon is finally setting in. We are so fortunate that he was given three weeks paternity by his employer and our older son and I have really gotten used to having him around the house. We have been having so much fun as a family, I almost forgot to post about the last two projects I completed before heading to the hospital.
To complete the “camping” theme of the nursery, I really wanted to have a tent for my toddler son to play in. When I saw this teepee on the Land of Nod website, I was in love, but I definitely didn’t have $159 to spend on it. The striped tent also only comes in orange/beige or black/beige, neither of which matched my nursery colors.
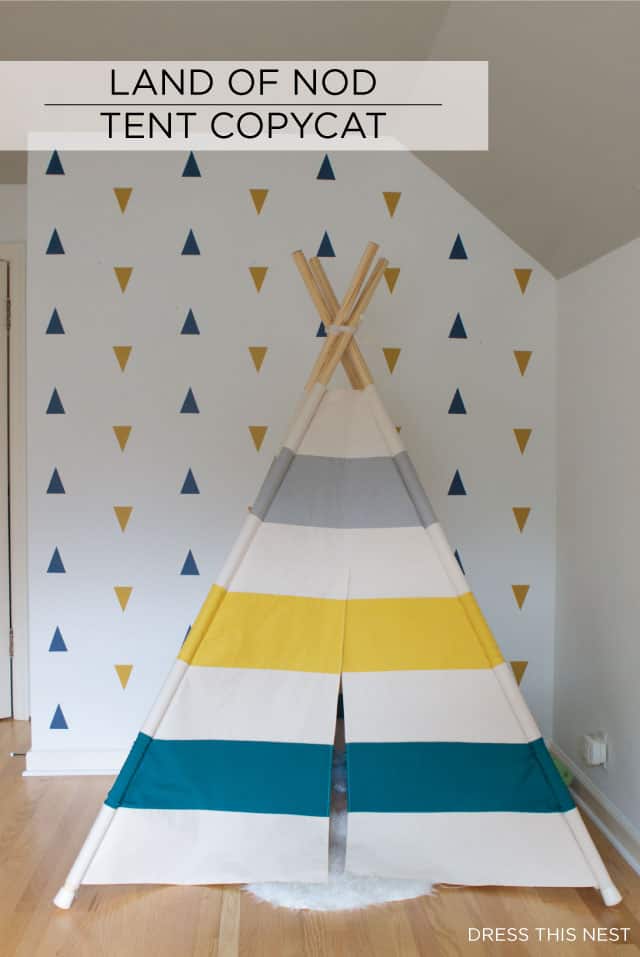
So, naturally, I decided to DIY it. I found this pattern on the blog Pink Toes and Power Tools and then made some adjustments to accommodate for the striped look I wanted. I used duck canvas instead of denim and wooden dowels instead of PVC pipe. To sew the duck canvas I used a heavyweight needle for my sewing machine and heavy duty thread. The wooden dowels I purchased at Home Depot (they are generally used for closet bars) and I bought them at 6.5′ lengths instead of 67″. The rubber feet were also found at Home Depot and are usually used to cover table legs.
Recreating the pattern to work with my stripes concept took some trial and error and a lot of math. To cut the pieces, I cut the fabric into 9″ wide strips (or in some cases 9 1/2″ or 5″ – see pattern) and then I measured the top length and bottom length to connect the sides. I folded the fabric in half and halved the top and bottom measurements to make working with the large scale fabric a little easier. Once I had my pieces cut, I started sewing the side panels together with 1/2″ seam allowance. When I was finished, I pressed all the seams.
Then I sewed the front panel pieces together and pressed those seams. I used 1/2″ seam allowances here as well.Sewing the pole casings were a little tricky. In order to get it to line up perfectly, I re-measured each stripe width against the side of the front panel so that they would be exactly the same. In some cases I adjusted the seam allowance to 1/4″ here so that it would be the right length.
After I had my striped pieces sewn together, I simply followed the tutorial on Pink Toes and Powertools to complete the teepee. Once sewn into one piece, I simply slid the poles into the casings and added the feet on the bottom. Then, I tied together the top with some string.
My son loves his new teepee and my husband has been reading him his bedtime stories inside of it each night. Another great use for the teepee is that it has become a great storage space for the stuffed animals. I had been searching for some way to display/hide them and once the teepee was set up in his room, it was sort of a no-brainer.
This project is really pretty simple and provides a great space for imaginative play. It took me a little longer because I had to calculate a lot of measurements, but it should be feasible to accomplish this in a weekend (or an afternoon if you don’t have a toddler). It really completes the room and adds a fun aspect for the boys.
Check back on Friday and I’ll be sharing how I spaced those MUR triangle decals on the wall behind it!
***UPDATE: Many of you have asked how much fabric I purchased. It depends on the width of the fabric you use. I bought 3 yards of the cream, 1.5 yards of the teal, 1 yard of the yellow and 3/4 yards of the grey. I believe the fabric width was 54″ for each.